

How to Jail a Site on Shared Hosting?
- By Admin --
- Oct 07,2021 --
- 2405 Views ,
- 4 Comments
The concept of jailing a website is technical for the users who have not been into such stuff before. You can limit the access for the users using this technique, thus making your files secure.
If you have no idea about the process of jailing a website, we have covered it in this article. You can follow the steps to get the results. But before we get into it, let’s discuss the difference between a jail shell and a normal shell, so you can be sure why you need jail shells.
Difference between jail and normal shell:
In the jail shell setting, unauthorized users are not allowed to access the files of others'. All the content for a particular shell remains limited to authorized users. But this is not the case in the normal shell.
In the normal shell, the content, files & folders of a particular user are visible to others too. Depending upon your needs, you can choose which often would work for you.
Process to jail a website on shared hosting:
Below is the process to jail a website on shared hosting:
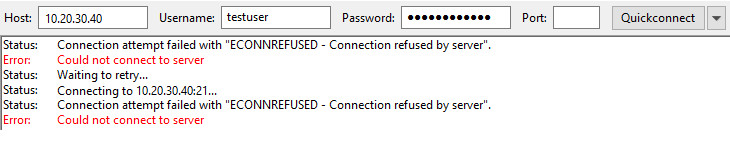
- Login to your c-panel, entering your username and password.
- In the c-panel search bar, type account functions, and you’ll have a list of activities to perform.
- Click on manage Shell access.
- You’ll see a list of users and domains on this page. Find the user for whom you want to establish a jail. Click on jailed access.
- Your website on the shared hosting is jailed.
Summing up:
The process of the site jail is not technical, but you have to be careful about what you do. Putting in extra restrictions can limit the functionality, and you’ll have to alter it to get it back to its original position.


Comment