

How to Add Favicon to Website (Complete Guide for Beginners)
- By Admin --
- Apr 29,2021 --
- 7631 Views ,
- 0 Comments
Do you know Favicon can play a significant role in making the customer’s journey easy, especially if you are offering help or tutorial of some kind, which will require them to switch from your blog to their website?
So, here in this article, we’ll share more about Favicon, what it is, and how to add it to your website to provide the best customer experience.
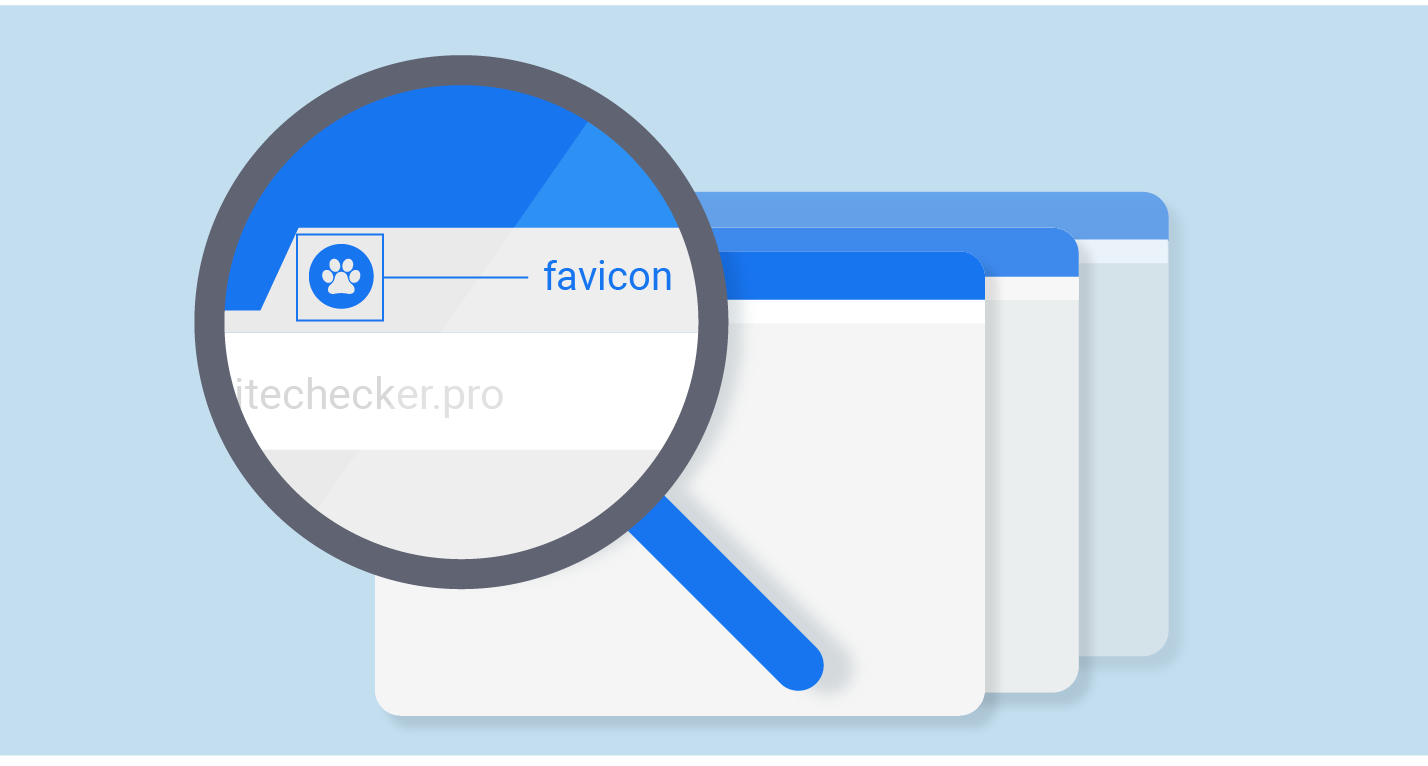
What is Favicon?
Favicon is the smaller size logo of your website that comes beside the Meta title. It shows up in the top bar when a user opens your website. So, it is one of the important elements of creating brand awareness and enhancing brand identity using your website hosting.
Usually, websites add a smaller version of their logo, but you can even add anything different or specifically to address the style. It entirely depends on you.
How to add Favicon:
There are two methods for doing so.
Browsers can generate it automatically:
- To enable the browsers for generating your Favicon automatically, you can use the following procedure:
- Have your logo in .ico or .png file format. Name it as Favicon.
- Go to your C-panel, access the public_html folder, where you’ll find the File Manager.
- Upload the file Favicon here in this folder, and your Favicon is ready.
- Reload the website and check.
Edit the header.php file:
- In this method, you don’t have to convert your logo to .ico or .png format. Upload the logo to the public_html folder
- Now open wp-content -> themes folder. Find the theme you are using.
- After opening the header.php file, place the following code: <link rel="shortcut icon" type="image/jpg" href="/favicon.jpg"/>
- It should be at the end of the <head> </head> tag.
- Save changes, and you’ll see Favicon on your website.
Alternatively, you might use the front-end editing feature offered by WordPress and add your Favicon in the specifically provided section. It will automatically change the header.php file.
Wasn’t that easy? So, go ahead and do it now
Also Check: How to inspect elements


Comment