

How to Shell Shared Hosting? (Complete Guide)
- By Admin --
- Oct 07,2021 --
- 2539 Views ,
- 8 Comments
If your website is growing and you have just started reaping the fruits of your efforts, you must be extra cautious about your website’s security. Cyber attacks are quite common. You would not want to lose your website to malware or professional hackers while transferring data or maintaining your website using remote access.
Although there are different security options available for you, especially if you are running a WordPress website. But the hackers are usually aware of the bugs in the plugins, and your website’s security would still be at risk.
So, to get a secure medium, enabling SSH or shell is what the experts recommend. This is what we’ll cover in this article.
What is SSH?
SSH allows a secure network to log in to your website and exchange data between devices. Its cryptographic properties ensure access for legitimate users only.
What benefits should you expect by enabling SSH?
Enabling SSH allows you to:
- Manage your hosting remotely
- Adding or removing files or directories from the website is possible
- Import and export of your databases is possible with great ease
- Create a connection between two servers.
How can SSH help in shared hosting?
While hosting your website on a shared hosting plan, you’ll have multiple other users on the same server. This means your website is at a higher risk of being attacked by hackers.
Suppose you don’t have this extra layer of security for your website, working on this plan, then the corruption or hacking of any of the websites on the server would impact your website as well.
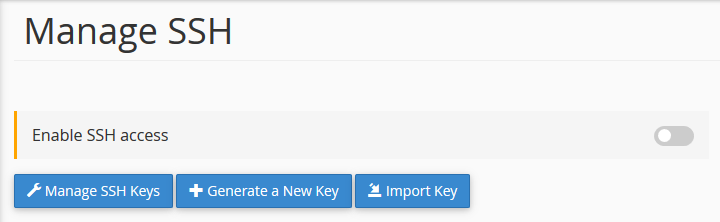
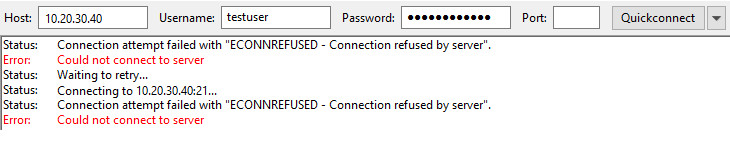
How to enable shell-shared hosting?
Here’s the process:
- Login to the c-panel associated with your website that you want the SSH for.
- Under the “security” head, you’ll find SSH access.
- Click on Manage SSH Access.
- Fill in the password. Make sure it is strong.
- Generate a new key.
- Once clicked, you’ll have your SSH key ready.
But the process isn’t over yet. You’ll have to authorize the key before you can utilize it.
- To authorize the key, you’ll have to go to “the security” head again.
- Go to Manage SSH.
- In the public keys, you’ll find your newly created key. You’ll find “not authorized” written in front of it. So, it will be easier for you to identify the relevant ones.
- Click “Authorize,” and you have your shell enabled on shared hosting.
Summing up:
No doubt, shared hosting plans are economical, but they come with security issues and higher risks. Thus, shells and other such security measures becomes a must-have thing.


Comment