

How to install an SSL Certificate in WordPress
- By Admin --
- Aug 24,2021 --
- 3066 Views ,
- 0 Comments
Installing an SSL certificate on your WordPress website seems a dreadfully long process. But actually, you only require a few clicks to get things right.
Let’s start the discussion with what it is before we can jump to the installation process. Also, make sure you have good WordPress hosting.
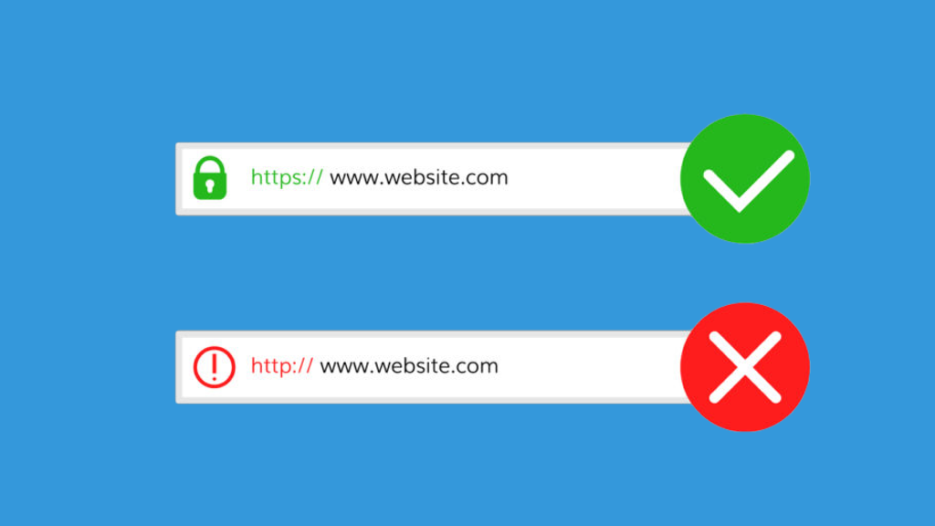
What is an SSL certificate?
Secure Sockets Layer, more commonly known as SSL, is responsible for encrypting information of the user between the website and the browser. It helps your users in securing their data from hackers and third-party intruders. This means providing personal data and incurring the financial transactions becomes secure on your WordPress website.
How to install an SSL certificate?
The installation of SSL on your website was a challenging process, but it is a gone thing. Now, the hosting service providers often do the most part, and all you have to do is make a few clicks. Even a few hosting companies also offer free SSL Certificates for a year.
Each hosting provider has a slightly different process to get it done. But here, we are sharing the installation of certificates via Cpanel. No matter how your c-panel looks, you’ll have these options available. So, follow the process and get your SSL ready.
One important thing to note here is you must have your certificate ready before installing it. It could be the free certificate your hosting services offer or the purchased version.
1: Login to your c-panel
2: Look for SSL/TLS
3: You’ll find Generate, view, upload, or delete SSL certificates option
4: Once you are redirected to a new page, you’ll have the option to upload your SSL Certificate.
5: Upload your certificate.
6: From the previous page, select manage and then go to browse certificates.
7: You’ll have a look at all the available certificates. Use the certificate that you just installed for your domain.
8: Scroll down and click on install certificate.
9: Your SSL Certificate has been installed.
Be sure that you force HTTPS on your website and analytics account. In most cases, it is done automatically because of the SEO Plugins. But if you are not using any of them, then you’ll have to do it manually.
Summing up:
By following this simple process, your SSL Certificate is ready. Now your website will enjoy the benefits that come with the certificate.


Comment